TfsCmdlets: PowerShell Cmdlets for Azure DevOps and Team Foundation Server
![]()
![]()


What is TfsCmdlets?
TfsCmdlets is a PowerShell module which provides many commands (“cmdlets” in PowerShell parlance) to simplify automated interaction with Team Foundation Server (2010 to 2018) and Azure DevOps (Server 2019+ and Services).
By using TfsCmdlets, Azure DevOps administrators and/or power users can create scripts to automate many different tasks, ranging from retrieving work items to creating new team project collections.
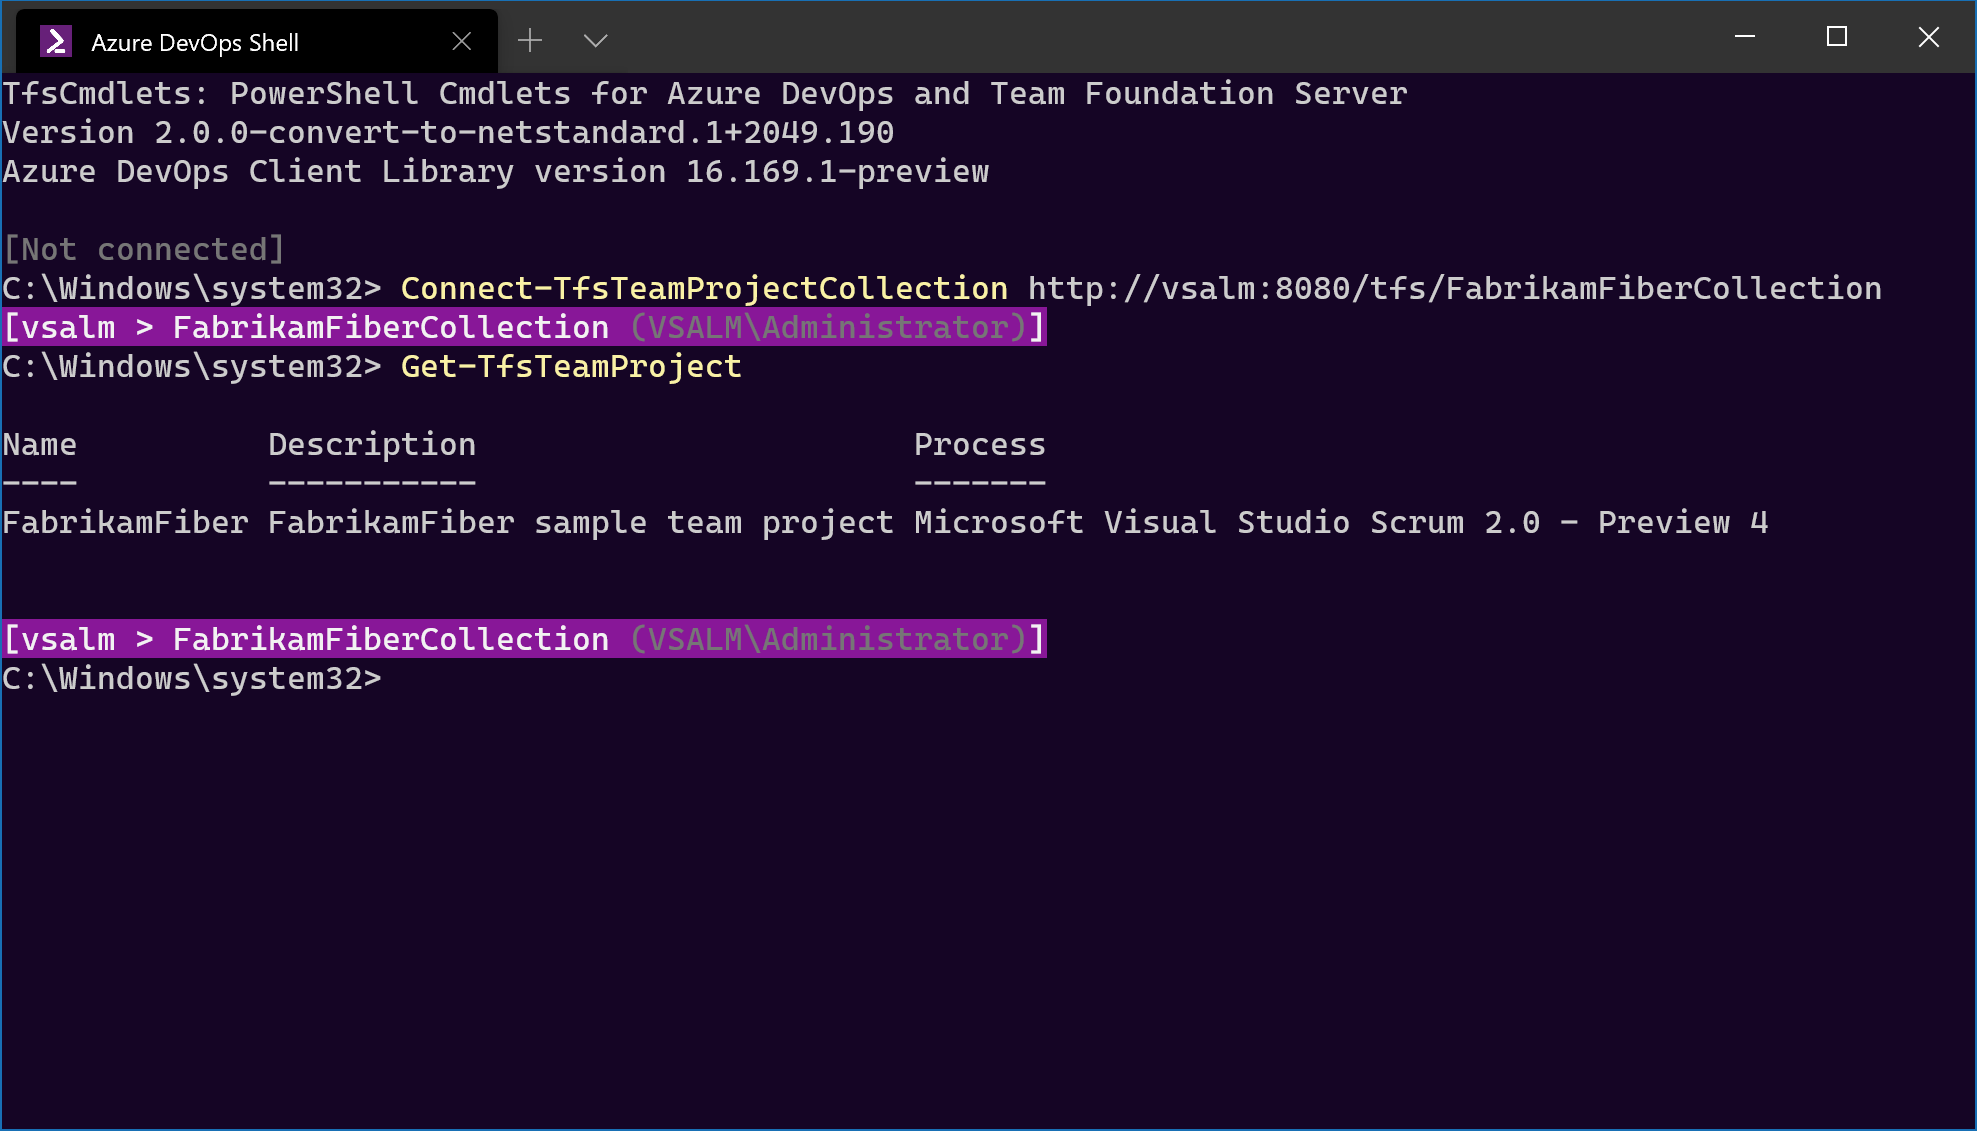
TfsCmdlets is available in many installation formats. It also includes Azure DevOps Shell, a PowerShell window pre-configured to make interacting with Azure DevOps via command line a joy!
Quick start guide
Do you have an Azure DevOps account created? Awesome! If not, you might want to create one.
HINT: Optionally, you may consider to leverage the Azure DevOps Demo Generator to fill a team project with sample data, in order to have a sandbox to play with. The examples below will assume that you created a team project called PartsUnlimited, based on the namesake template available at the Azure DevOps Generator web site.
Next, install TfsCmdlets in your computer (see section “How to install”, below), open a PowerShell window and try the following commands:
# Connect to your Azure DevOps organization
# (Will be used as default for the -Collection argument when required by a cmdlet)
Connect-TfsTeamProjectCollection https://dev.azure.com/<your_organization_name>

# Get a list of team projects in the currently connected organization
Get-TfsTeamProject

# List the existing iterations in the PartsUnlimited team project
Get-TfsIteration -Project PartsUnlimited

# Connect to the PartsUnlimited team project
# (will be used as default for the -Project argument when required by a cmdlet)
Connect-TfsTeamProject PartsUnlimited

# Create a new iteration
New-TfsIteration 'Sprint 7'

# Get all bugs in the current team project
Get-TfsWorkItem -WorkItemType 'Bug'

# Create a new PBI in the 'Sprint 7' iteration
New-TfsWorkItem -Title 'New product backlog item' -Type 'Product Backlog Item' -Iteration 'Sprint 7'
How to install
TfsCmdlets can be obtained from many different sources and in many different formats. Choose the one most suitable to you!
PowerShell Gallery
If you’re using Windows 10, Windows Server 2016 (or later) or have installed Windows Management Framework 5 (or later) then the simplest way to install TfsCmdlets is via PowerShell Gallery.
Open an elevated PowerShell prompt and type:
Install-Module TfsCmdlets
Optionally, you can install it locally in your user profile. That is particularly useful when you can’t run as an administrator or don’t want to make the module available to all users in the computer:
Install-Module TfsCmdlets -Scope CurrentUser
Windows Package Manager (winget)
The new Windows Package Manager (“winget”) is a command line tool that enables developers to discover, install, upgrade, remove and configure applications on Windows 10 computers. This tool is the client interface to the Windows Package Manager service.
To install TfsCmdlets via winget, open a command prompt and type:
winget install TfsCmdlets
Chocolatey
Using Chocolatey? Then open an elevated PowerShell prompt and type:
choco install TfsCmdlets
Nuget
Nuget is a great option if you need to integrate TfsCmdlets with your continuous integration process (e.g. you need to create a TFS work item during the execution of an automated build).
To add TfsCmdlets to your solution, search for TfsCmdlets in the Visual Studio “Manage Nuget packages for solution…” dialog.
- Note: To add the latest pre-release version of TfsCmdlets, don’t forget check the “Include prerelease” checkbox
Offline installation
When the target machine is not connected to the internet, none of the options above are available. In that case, your best bet is one of the offline installation alternatives below.
You can get one of the offline installers listed below from the GitHub Releases page.
Full installer (MSI-based)
The full installer will install the module files to the Program Files folder in your computer, make the module available to PowerShell and create the Azure DevOps Shell icon in the Start Menu.
To install the full installer:
- Download the MSI file from the Releases page;
- Open the downloaded MSI file
NOTE: If Windows SmartScreen flags the file as insecure and refuses to run it, you can click the “More info” button/link in the dialog and select the “Run anyway” option.
To uninstall the full installer:
- Use the Programs and Features (formerly “Add and remove programs”) function in the Windows Control Panel.
Portable installer
The portable installer is a zip file containing all the required the module files.
To install the portable installer:
- Download the zip file from the Releases page;
- Open your Documents folder in Windows, then open folder
WindowsPowerShell(for PowerShell 5.1) orPowerShell(for PowerShell 6+); - Inside the PowerShell folder, create a new folder called
Modulesin it (if missing) and then create a new folder calledTfsCmdletsinModules; - Extract the contents of the zip file to the
TfsCmdletsfolder.
You must end up with a folder structure similar to [Documents]\[Windows]PowerShell\Modules\TfsCmdlets. Files such as TfsCmdlets.psd1 must be located in the TfsCmdlets folder.
To test the installation, open a new PowerShell window and type:
Import-Module TfsCmdlets
To uninstall the portable installer:
- Close all PowerShell windows where you were using TfsCmdlets (to free files in use);
- Delete the
TfsCmdletsfolder from the[Documents]\[Windows]PowerShell\Modulesfolder.